Arc3dworks
LED Rim Kit Lights - Talaria XXX (17" Rims)
LED Rim Kit Lights - Talaria XXX (17" Rims)
Free shipping on orders $50+ 🚚
Couldn't load pickup availability
Arc 3D Works Color-Changing LED Rim Kit for Talaria XXX (17" Rims)
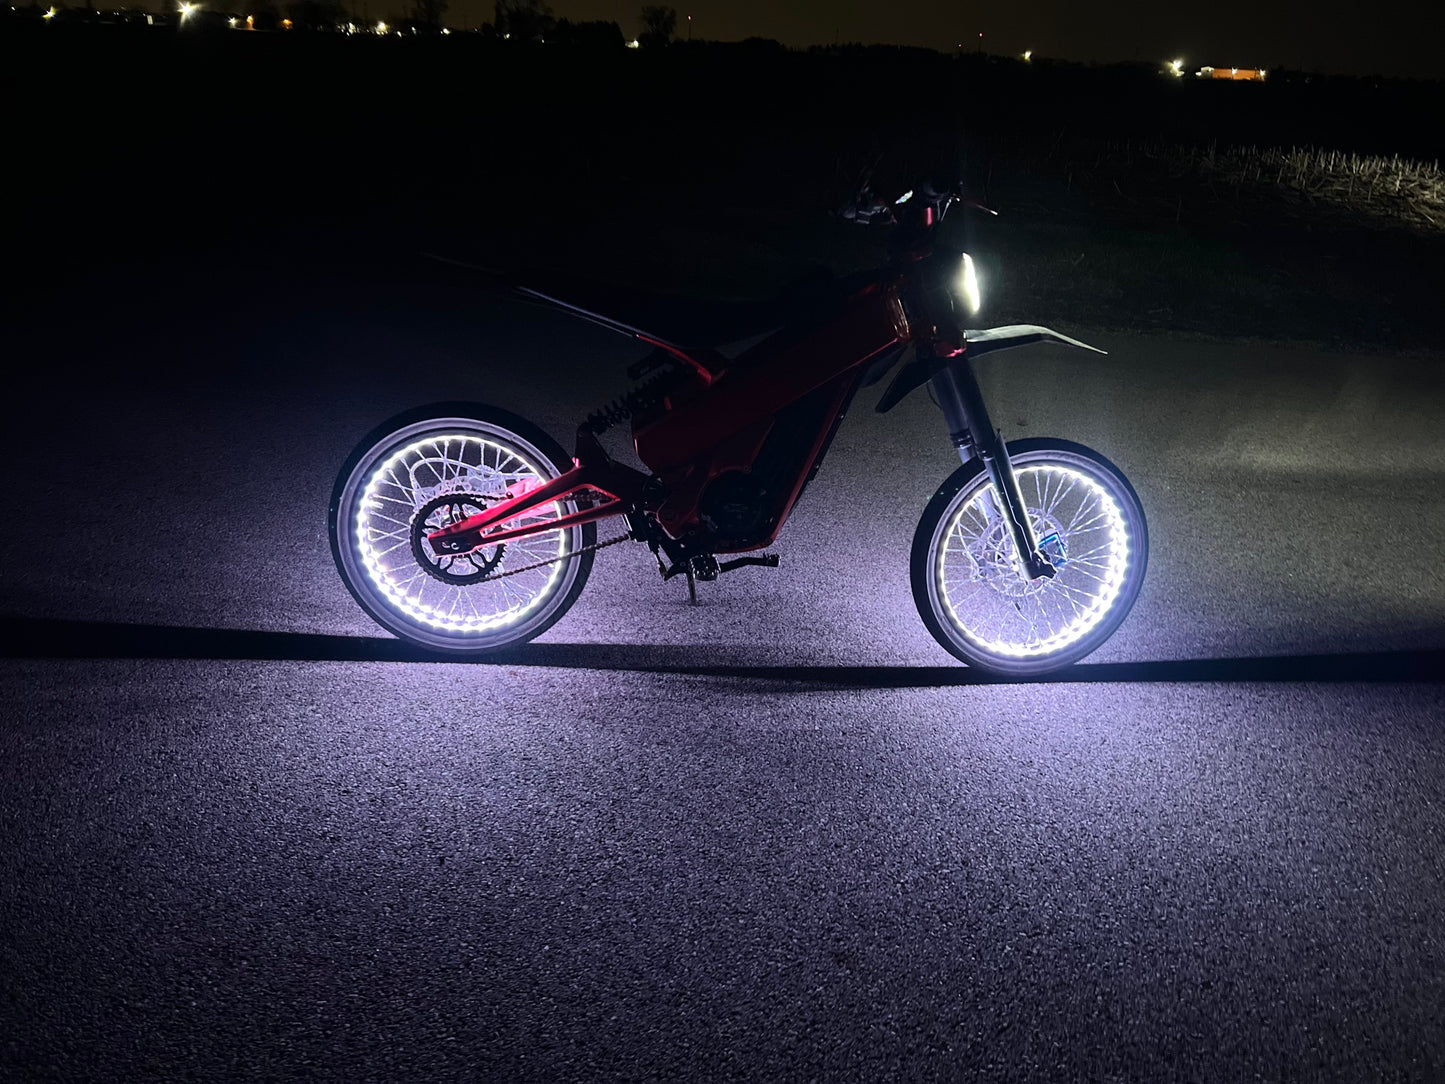
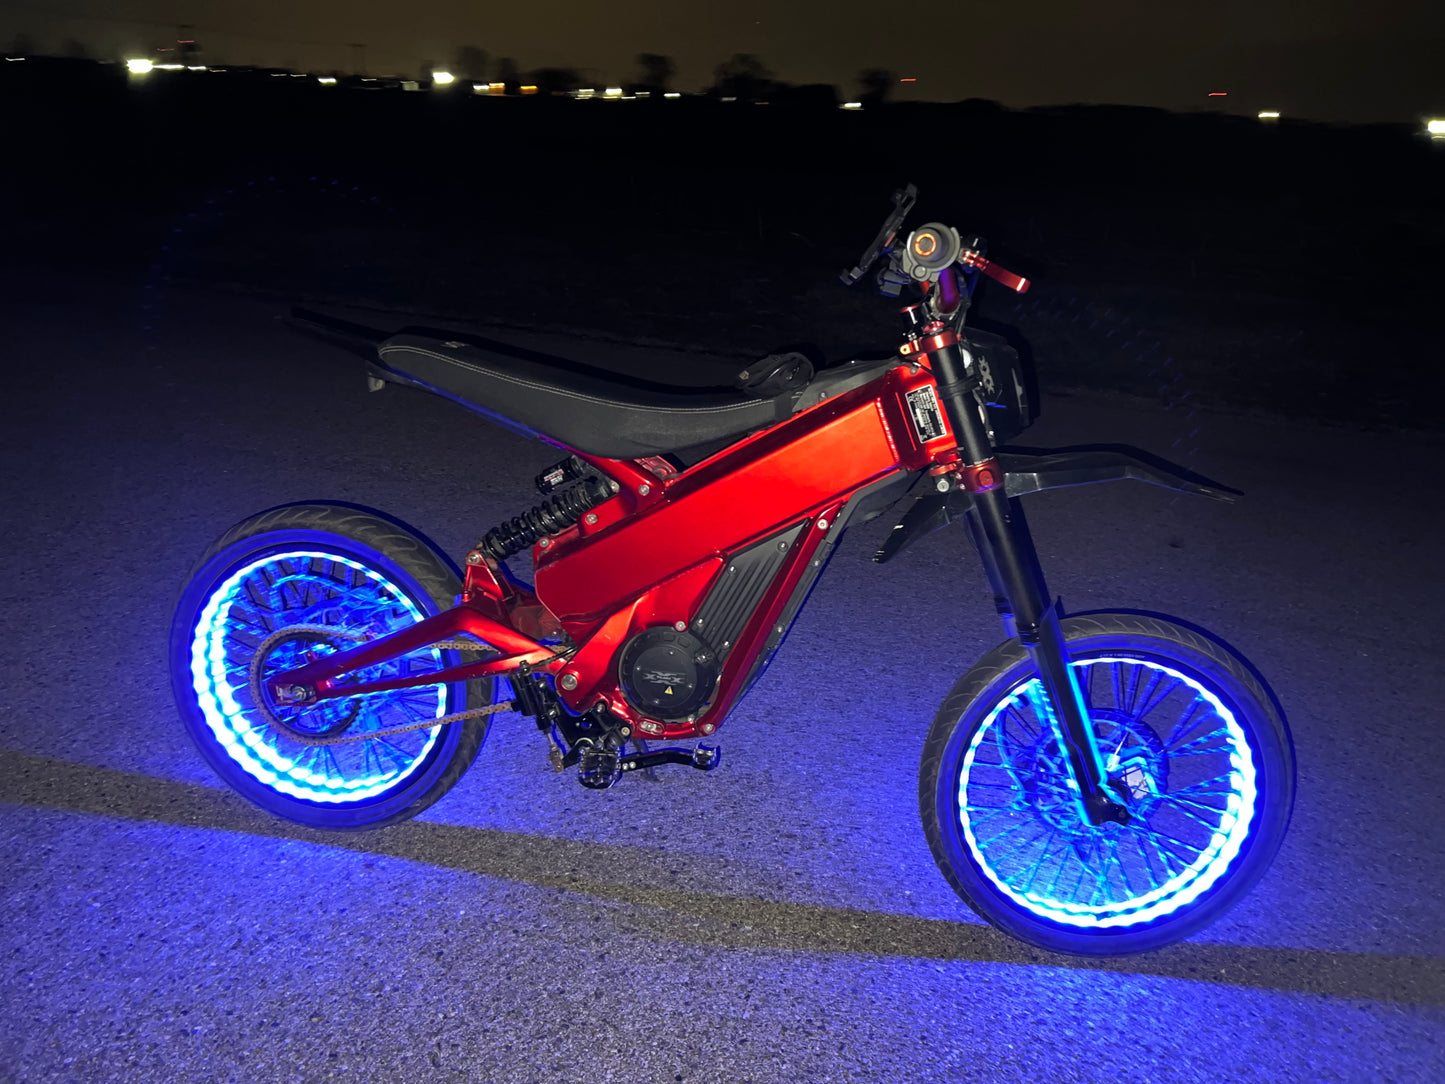
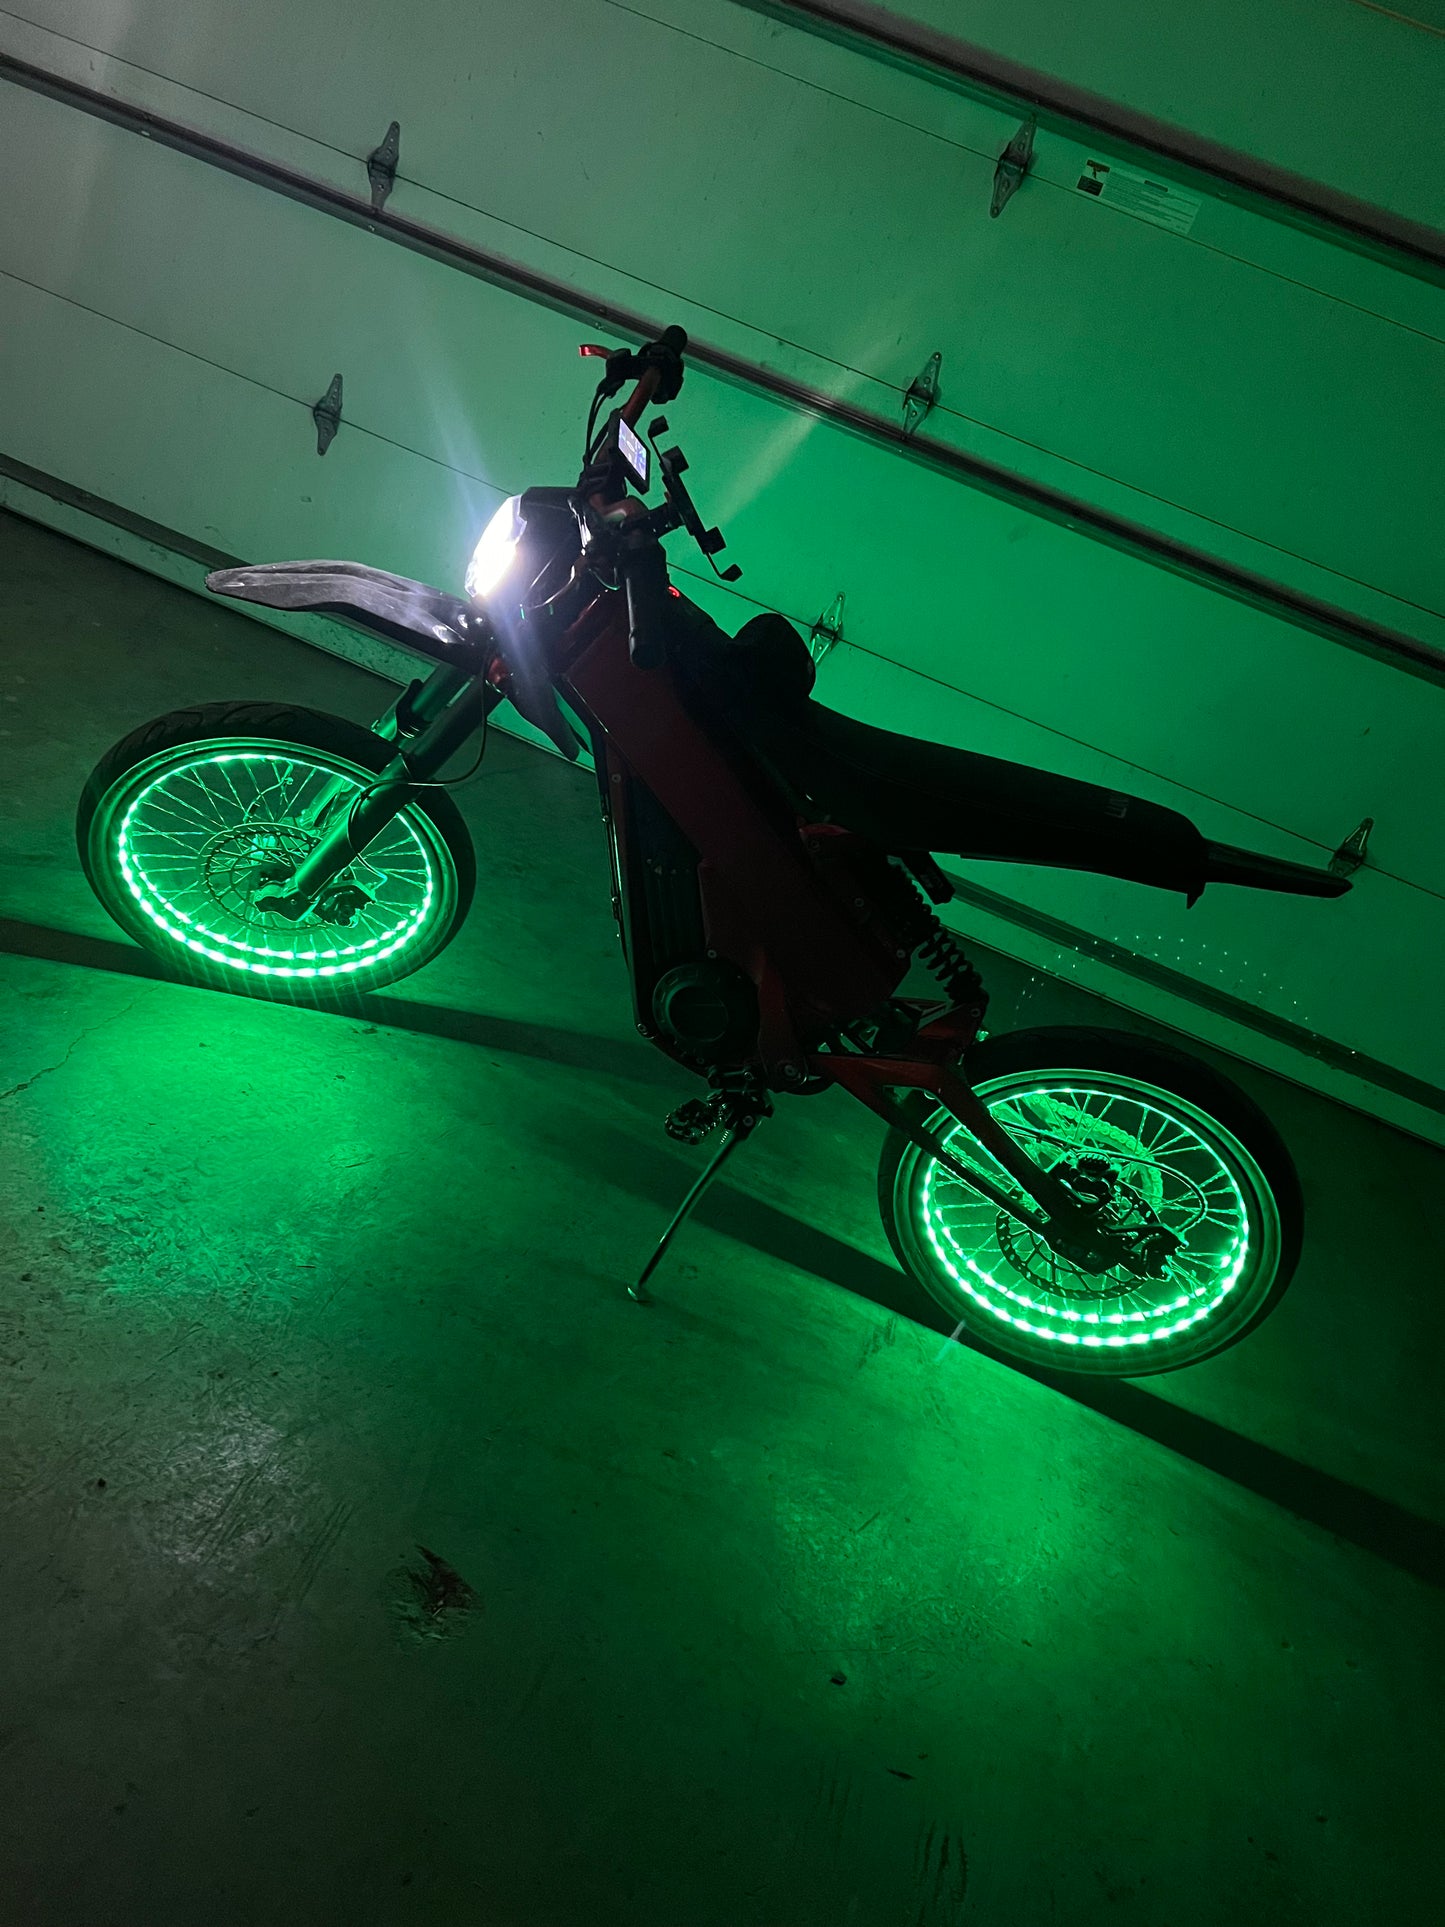
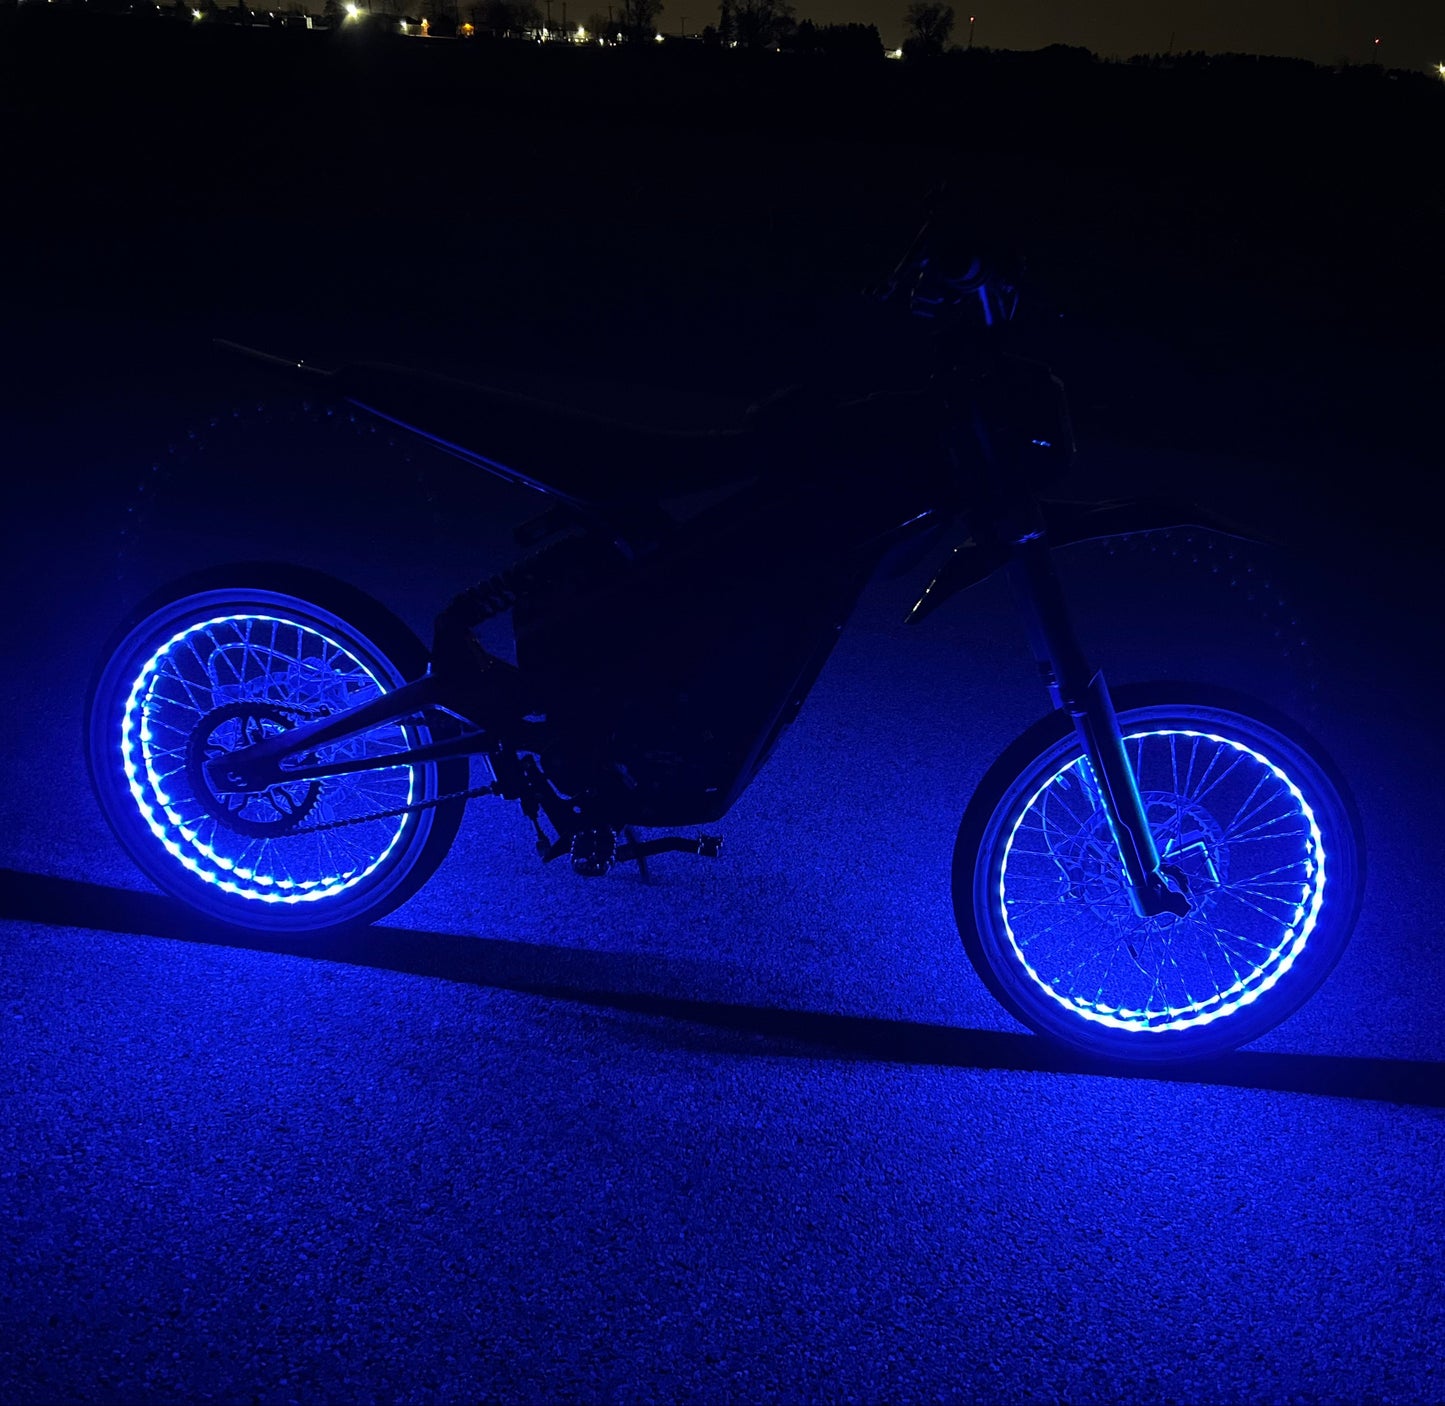
Transform your Talaria XXX with the Arc 3D Works Color-Changing LED Rim Kit! Designed exclusively for Talaria XXX (17" rims), this kit lets you light up the night with vibrant, customizable colors. Switch between green, red, blue, white, and many more colors with the included remote—perfect for night rides, burnouts, or showing off your style.
Why You’ll Love It:
- Vibrant Color-Changing LEDs: Choose your vibe with multiple colors, controlled by a sleek remote.
- Built to Last: IP65 waterproof and dustproof, tested for 200+ miles of rollers, burnouts, and rides.
- Perfect Fit: Made for Talaria XXX 17" rims.
- Easy Installation: Custom hub bracket securely mounts the battery and controller with a simplistic bracket design.
What’s Included:
4x LED strips (for both wheels), custom hub brackets, 2x rechargeable battery, 2x controllers, remote, 8x zip ties, 2x battery chargers, 3M double sided tape, 2x y-split LED connectors, and 4 bolts (To assemble the brackets together). 
Specifications:
- Compatibility: Talaria XXX 17" rims
- Water Resistance: IP65 (If hot glue is used)
- Battery Life: About 4 hours per charge (varies by usage)
- Weight: 4.1 lbs (Packaged)
Installation Instructions:
Follow these steps to install your LED Rim Kit. Take your time, and ensure all connections are secure for optimal performance. Tools needed: heat gun (optional), hot glue gun (optional but recommended), Phillips screwdriver, and a clean cloth.
Step 1: Prepare the Rim
Clean the rim thoroughly with a cloth and isopropyl alcohol to remove dirt and grease.

Apply double-sided tape around the rim, ensuring even coverage. Cut the tape once it’s fully around the rim.

Step 2: Attach the LED Strips
Place the LED strip on top of the double-sided tape, pressing down firmly to ensure a strong bond. A heat gun can help the LEDs adhere better—use on low heat for 10-15 seconds per section.

Ensure both LED connectors face the same spot on the rim and align with the tire’s directional arrow.

Step 3: Mount the Battery and Bracket
Insert the battery pack into the hub, positioning the battery terminals facing down.

Slightly stretch the battery bracket over the battery until it fits snugly.

Attach the other side of the hub bracket and insert the two provided screws into the holes. Tighten them slightly into the nut (do not fully tighten yet).

Step 4: Connect the LED Wiring
Connect the Y-led connectors to the LED strip connectors on both sides of the rim. Make sure the arrows on the y-led are both facing the rotor side

For added waterproofing, apply hot glue around the connections using a hot glue gun (optional but recommended).

Take the two Zip Ties and zip tie the lower y-led wire to the lower part of the spoke, then zip tie the the starting of the single wire from the y splitting.

Turn the bracket to align all of the wires and feed the remaining connector from the Y-split LED connector under the controller, keeping it neat.

Connect the single LED connector to the controller connector, ensuring the arrows align, then mount the controller onto the second bracket using the two provided screws.

Turn the hub slightly to remove slack in the Y-split wire, but avoid pulling too tight to prevent the LEDs from peeling off.
Step 5: Secure and Organize Components
Tighten the two bracket screws fully to secure the assembly. Feel free to unscrew the controller if it makes it easier to tighten the bracket bolts just make sure to screw it back.

Tuck the extra LED terminal and infrared antenna through the battery bracket. Pull the infrared antenna out just enough so it sticks slightly out of the bracket and zip tie it to a spoke. This gives the remote a better signal.

Wrap the battery pack charge terminal around the side of the hub tightly and zip tie it to a spoke.


Step 6: Finalize and Test
- Let the wheels sit for 24 hours to allow the double-sided tape adhesive to settle fully.
- Turn on the controller with the remote to test the LEDs. Check all colors and ensure no wires are loose.
- If any LEDs are loose, reapply pressure or use the heat gun to reseal.
How It Looks Installed: 


⚠️ Disclaimer:
This LED Rim Kit is designed for street use only. It is not intended for motocross, big jumps, or aggressive off-road riding. Wheelies and normal street stunts are fine—just proceed with caution. Before each ride, make sure your bracket screws are tight and all wiring connections are secure. Improper use or loose parts can lead to damage or failure. Use common sense and ride safe.